About me
Ciao Sketchfab!
I’m Massimiliano Turco, I’m 27 years old and I’m a 3D artist from Bogliasco, a small village by the sea in Liguria, Italy.
Art, in one way or another, has always been a part of my life. As a teenager, I attended the Art High School but I never really pursued an artistic career.
Due to the recent COVID-19 emergency, during the lockdown, I had the opportunity to rediscover art under a new interesting medium: 3D.
I began to watch tutorials and practice a lot, and—much quicker than I had expected—I got the hang of it, I loved it.
After years spent completing studies in opposite fields than art, I found my way back to it and it’s exciting.
Idea
This project was originally created as an entry for the CG Boost “Steampunk Gear Challenge.”
I had to get an overall idea of the whole “steampunk” concept, therefore I began browsing around Pinterest and ArtStation, looking for something to fuel my creative process. Suddenly something popped into my mind: “Let’s steampunk the Ape Piaggio from the ‘60s!”
As an Italian, I’m pretty proud of the undeniably weird design of it but I thought a steampunk version would give it an even quirkier look.
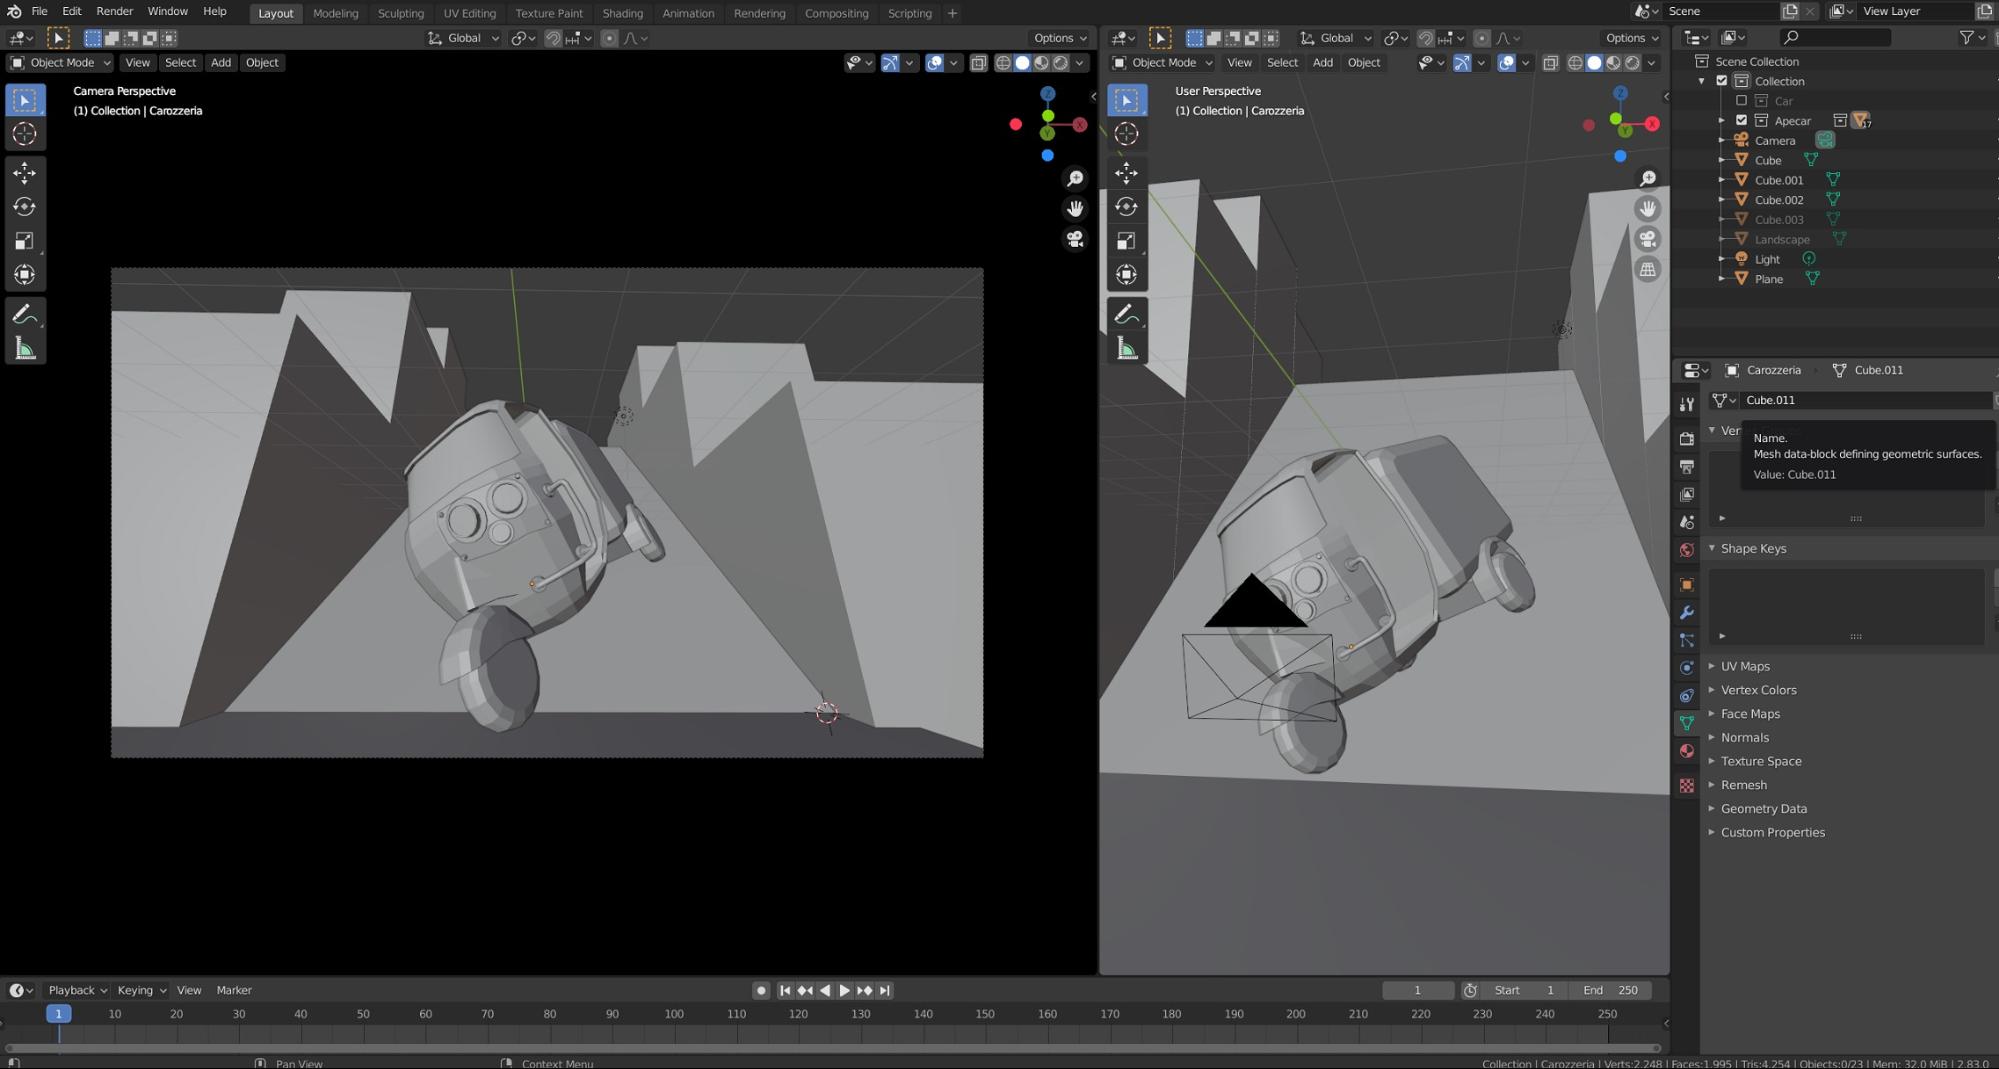
For the environment, I initially wanted to place it on a sloped road:
I continued to develop the initial concept, however, and decided to make it “fly”. Giving it this new “in motion” look, I opted for a more dynamic scene: the ocean. Plus, I do love the contrast of teal and orange.
Concepting and modeling
The concepting and modeling part took place in Blender.
I completely skipped the whole concepting and sketching process. I know this is not the best approach but here I was: with some steampunk elements figured in my mind, ready to create, building on that.
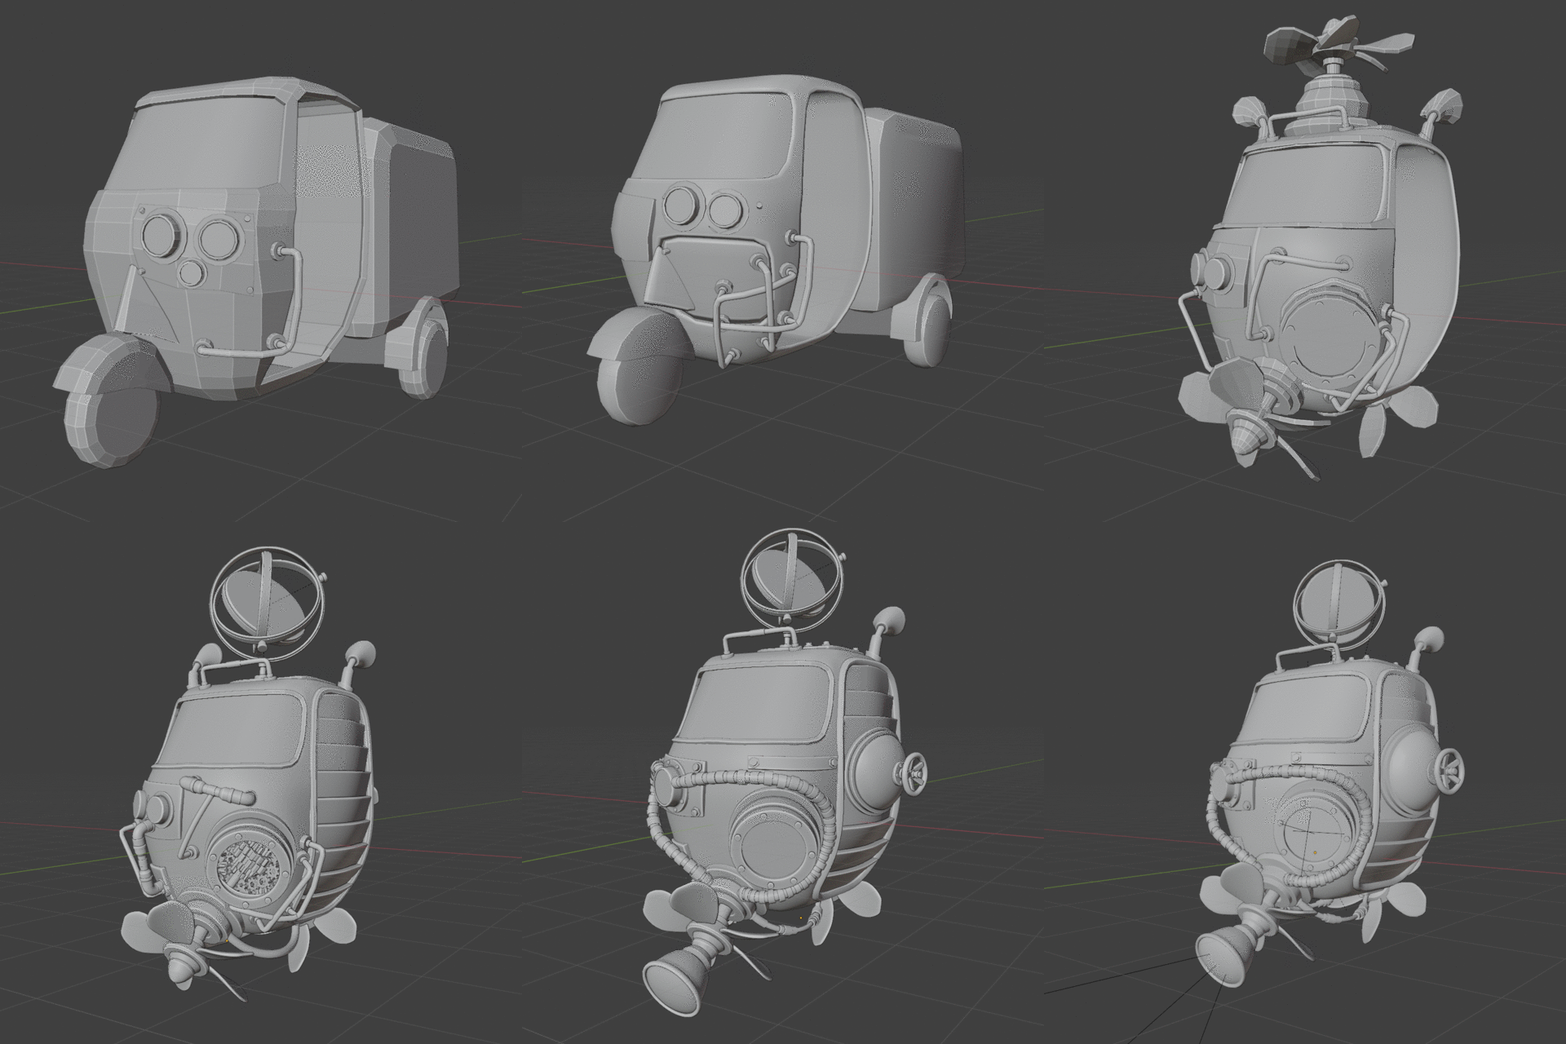
I started by blocking out the frame of the Ape and began adding and removing shapes.
Below, the different iterations of the concept:
I’m pretty pleased with the end result, but it was tiring working like this. Visualizing your idea in 3D is amazing, but modeling requires time. Even for simple shapes, it can get overwhelming and you risk losing focus.
The ocean diorama was made by merging a slightly displaced semi-sphere with a plane to which an ocean modifier had been applied.
I used the boolean union operation, then I decimated the mesh and cleaned the topology up a bit. The last step was flipping the normals on the tops of the waves.
UVs and texturing
I quite liked UV unwrapping the scene and, since it’s mostly technical and not really cognitively intensive, it helped me relax.
While I’m in the process I always like to put on a podcast (3D related of course :P) and just get on with it, mesh by mesh.
I still don’t get why a lot of my fellow 3D artists hate the UV unwrapping process so much.
To pack all of the UVs in an efficient way, I used the amazing “UVPackmaster” addon for Blender. I highly recommend it to everyone.
As a last step, I cleaned the whole scene, renamed the assets, and deleted and rearranged the collections to prepare them for the switch to Substance Painter.
Texturing
The texturing work was done in Substance Painter.
I started by adding normal and bump details and then baked the maps.
I worked with seven 4k texture sets. I know, it was probably overkill, but I wanted to get as detailed as possible for this piece.
My painting workflow pretty much consisted of picking some nice material, adding some generators or smart masks, and then going crazy with the tweaking.
To polish things out and make them more organic, I added a paint layer to all of them to hide the procedural and CGI look.
The ocean material was made by using a total of three fill layers, two of which were two shades of blue mixed together to provide some color variation. The third one, which I used to make the foam, was a white/grey fill layer with the height channel activated. I masked it using a generator that was driven by the AO map and then I painted it over to improve the feel.
The material reached its final form directly on Sketchfab where I played around a lot with the subsurface scattering options.
Final render for the challenge
Finally, when every piece was in place and back in Blender, it was time to set the camera and lights for the final render for the challenge.
To be honest, I did not enjoy this part that much, mainly because I feel I still lack skills on the composition and photography side and because I find it hard to translate a 3D piece to a 2D image. I’m always unsure what the best part of the model to showcase is.
I feel like I spent more time trying the different camera placements and the general lights tweaking than the actual texturing part.
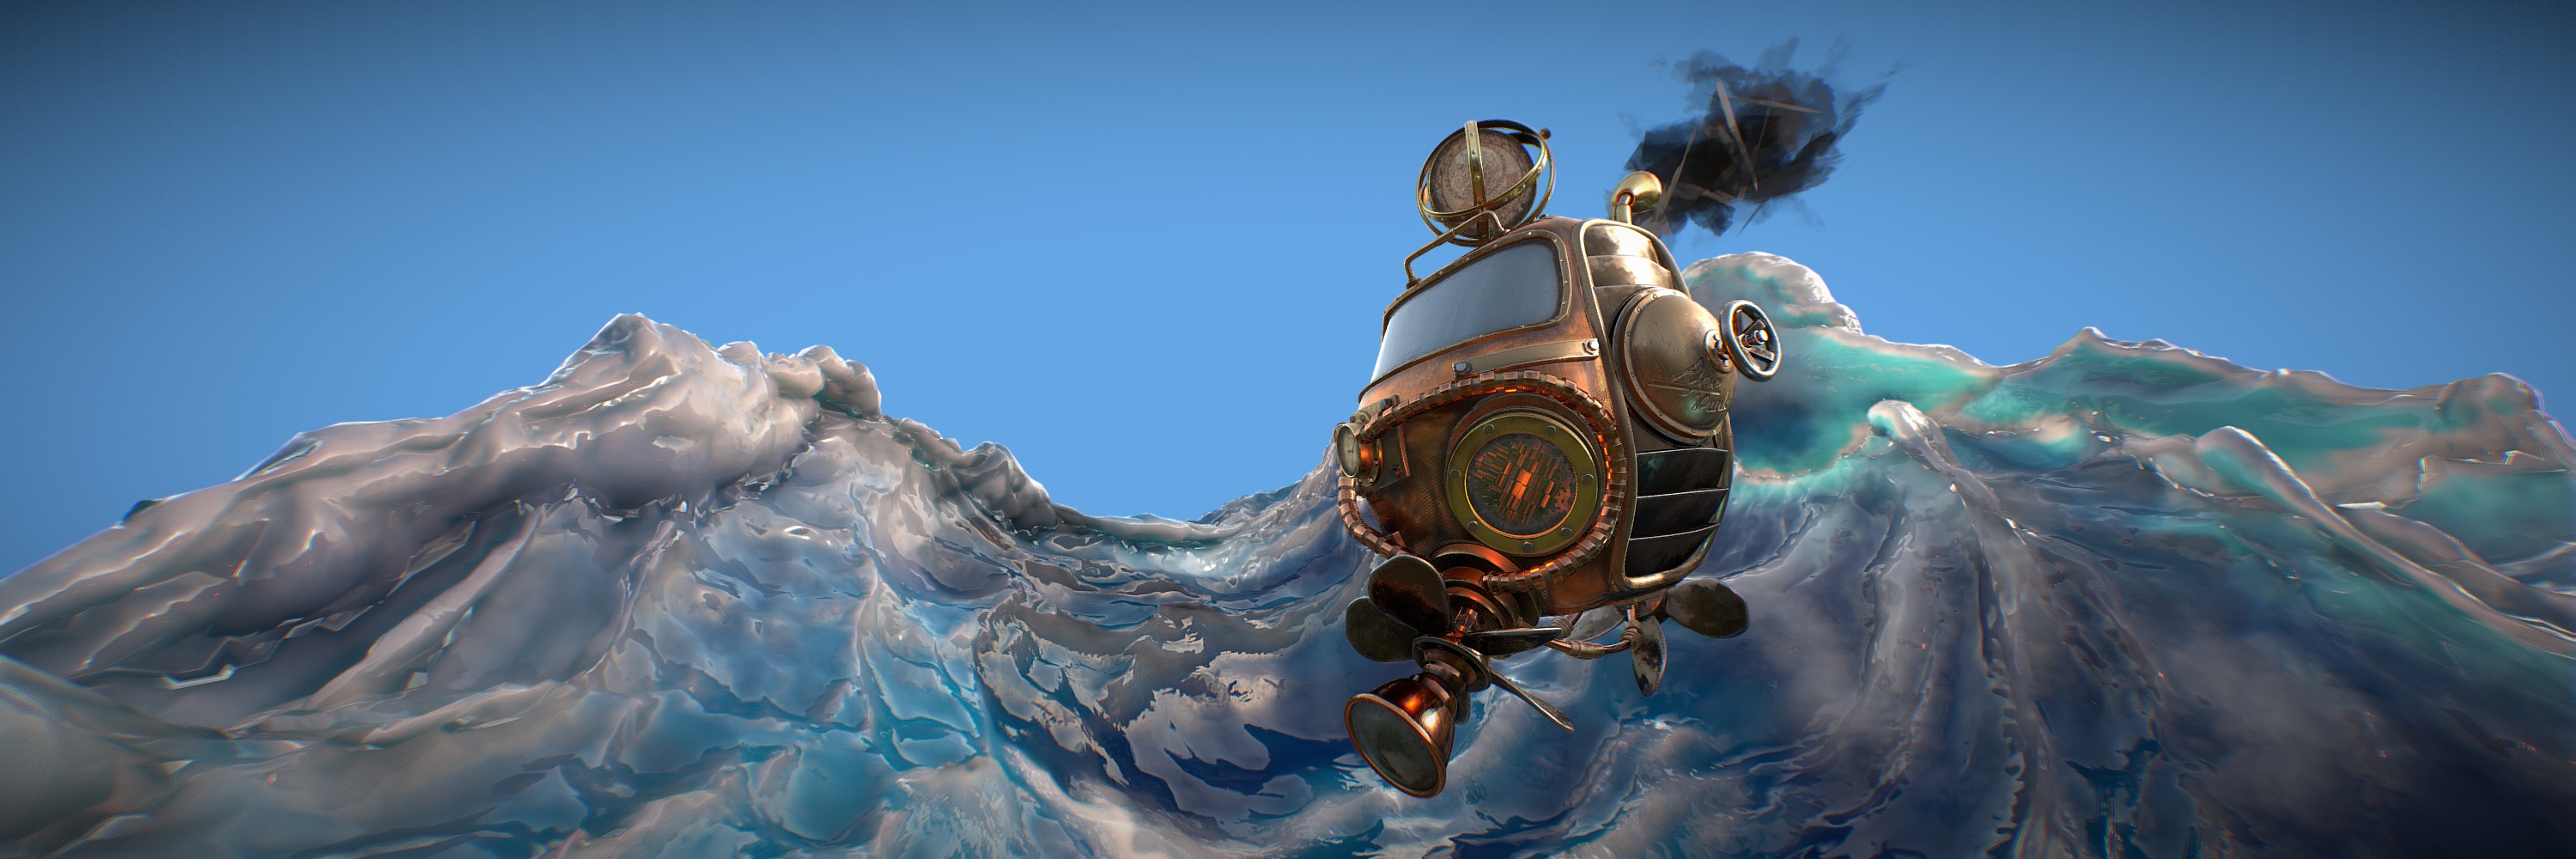
Here is the final render that I published for the challenge.
I added the smoke in Photoshop and color graded it in Lightroom.
In the picture you can see two laser weapon thingies in the distance—they chase the ApePunk, are they ready to shoot?
I didn’t include them in the Sketchfab diorama because I could not scale them properly and they would end up being a distraction.
Sketchfab
The Sketchfab workflow was a breath of fresh air.
After working for almost 20 days with a 2D image in mind, presenting my work for what it is—a 3D piece—was freeing.
I used Grant Abbitt’s tutorial on YouTube to familiarize myself with Sketchfab.
After that, it was just a matter of plugging in some textures and recreating the lights that I had in Blender (EEVEE).
To light up the scene, I used the built-in Kirby Cove HDRi.
I then used a point light to illuminate the “motor” and I used 2 bluish area lights below the vehicle to fake the water reflections.
I especially loved tweaking with the subsurface scattering options of Sketchfab.
They helped me achieve a look on the water that I couldn’t achieve in either Blender or Substance.
This was my first model published online. It was an honour being picked by the staff and being able to write something about my creative process.
A big thanks to Sketchfab and to the whole 3D community.
I hope there will be more to come.
Have a look at my model on Sketchfab:
