This guest post by the team at Agisoft provides tips and tricks to squeeze extra detail out of your photogrammetry image sets using advanced masking techniques – read on to up your PhotoScan skills and capture awesome 3D! Originally published on the Agisoft blog.
This tutorial introduces a new reconstruction method, which is able to handle thin structures like butterfly wings and illustrates how to enhance results with the new strict volumetric masking feature. With strict volumetric masking, applying a single mask can be enough.
New model reconstruction method
In previous versions of the software, polygonal model reconstruction required dense cloud data, and in some cases users faced the necessity of manually removing noise from the dense cloud, or masking nearly all images before building the dense cloud. The new mesh reconstruction method uses depth maps directly without the need to generate dense point clouds first.
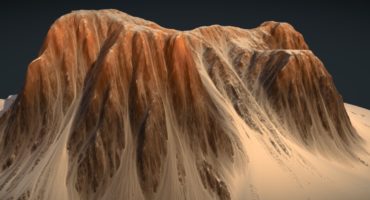
This article uses a butterfly dataset as an example, the data having been kindly provided by Philadelphia Insectarium and Butterfly Pavilion in collaboration with MACROSCOPIC SOLUTIONS, LLC.:

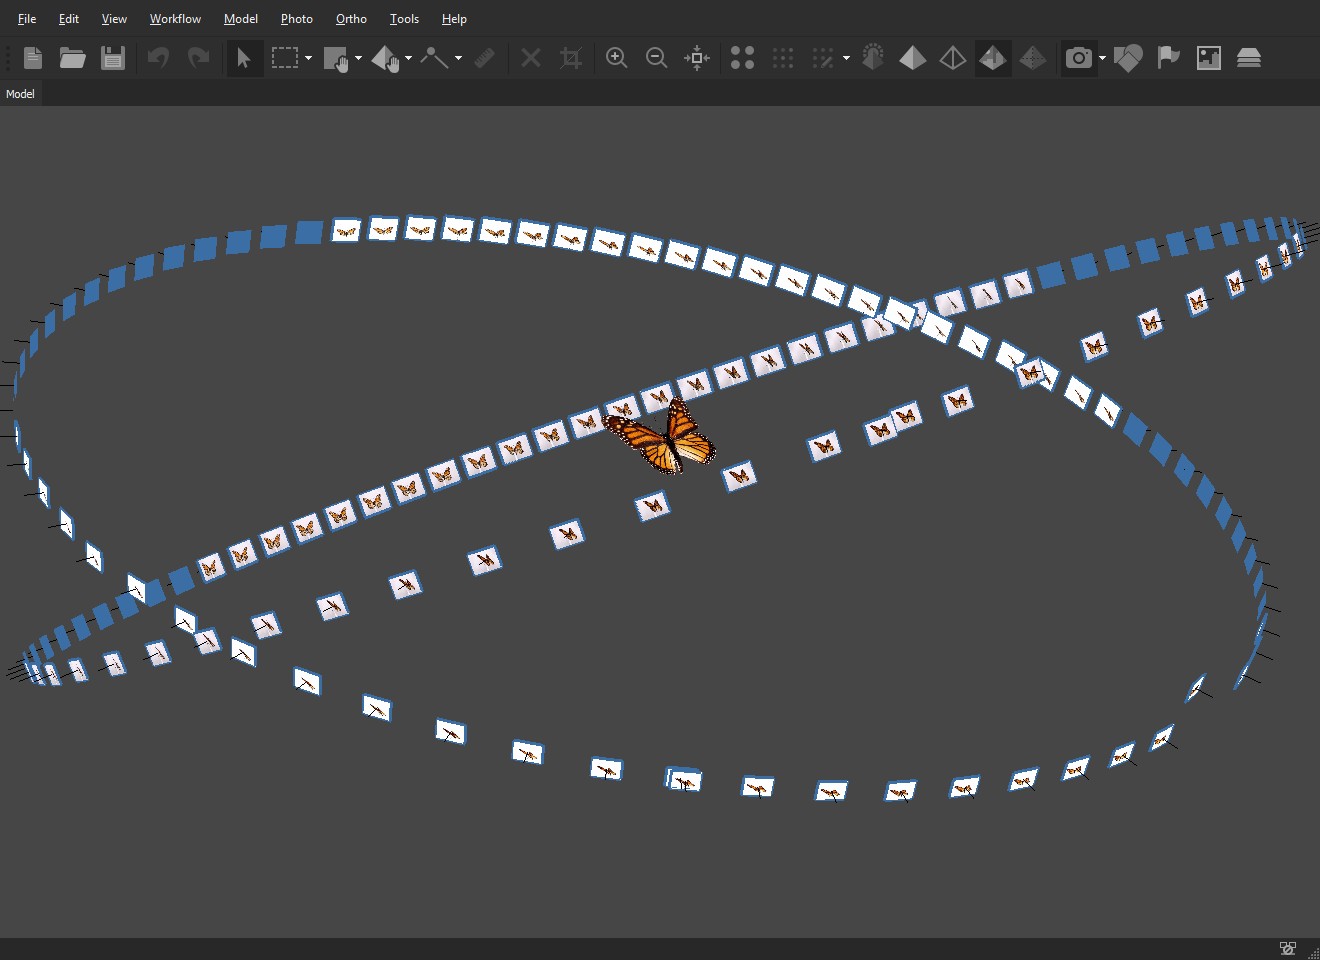
To build a model with the new method you should enable the functionality in PhotoScan 1.4 with Tools -> Preferences… -> Advanced -> Use visibility consistent mesh generation method. And then run Workflow -> Build Mesh… The only parameter that you need to choose is the quality of the depth maps used for mesh building. A mesh built from medium quality depth maps is illustrated below:

One can see that although the whole butterfly was reconstructed successfully, too much of the textureless white background stuck to butterfly borders.
Strict volumetric masking
The new model reconstruction method with strict volumetric masking makes it possible to remove this noise with a single mask. Please note that this masking is strict: each masked out pixel says to the algorithm that the ray coming from the respective camera through this pixel must pass only through the empty space. So please be careful and don’t mask something important.
Previously, in order to prevent textureless background from sticking to the model it was necessary to create masks for all images (at least coarse masks with magic wand or by color). Now you don’t need to create so many masks: just reconstruct the model without masks, and if there is noisy volume, suppress it with a strict volumetric mask on the image that observes the respective part of the space. Too many masks can lead to slow model reconstruction in the case of strict volumetric masking.
The white background can be masked out with the magic wand:
The pillar below the butterfly wasn’t masked, because it is a little bit darker in color. You can complete the mask with the scissors tool. Note that while you are holding Ctrl the scissors path will automatically go along the texture border, and thus you will have to do just a few mouse clicks to perform the task:
Note that to finish selection with scissors, you can just press Esc, and the current selection path will automatically connect to the beginning of the path (you can click Esc one more time to remove selection).
Be careful with all the meaningful parts: if you mask out a butterfly leg, it will not be reconstructed.
After masking out both left and right parts of the pillar with scissors, the mask will look like the following:

Now the model can be built, with the strict volumetric masking input being considered: Workflow -> Build Mesh… and tick Advanced -> Use strict volumetric masks.
The resulting model looks fine thanks to the single mask we applied:

Another example
This hand is another example of typical usecase:
1. Poisson method – mesh built from dense cloud with classic method.
2. New model reconstruction – mesh built with new visibility consistent mesh generation method without any masks.
3. After single strict mask – mesh built with new method with strict volumetric masking (single mask).
The data set have been kindly provided by Infinite-Realities.
There was a single mask used in example above and it has been created in a few clicks using scissors tool while holding Ctrl:

About the author
Agisoft
http://www.agisoft.com